Passing values
- Task – observe browser behaviour after POST request
- Anatomy of URL
- Building URLs with parameters
- Passing POST data
- Checking incoming data
- Task – build a multiple step form to add person’s contact information
- Summary
This chapter should familiarize you with various value passing techniques. It is important to know how to pass values around your application to be able to nest functionality – imagine that you want to add person’s contact information in your project. To store contact info in your database you need a person’s ID, ID of contact type and actual contact value (e.g. the phone number).
Meaningful interaction with web application is based on ability of the client (a web browser) to pass values from the visitor (a person) to the web server. HTTP protocol offers a few communication styles. These styles are called methods and you already encountered GET and POST method earlier. There are some other methods like PUT, DELETE and OPTIONS which are used for APIs. The combination of HTTP method and address is called a route in Slim – you can take a look at previous walkthrough article about named routes.
The main difference is that a request made with GET method should not have a body and the only way to pass values to the server is in the URL. Thus the parameters are visible and the visitor can copy the URL and store it as favourite or send it using e.g. email to another person which can click that link and view the site in exactly same state.
See HTTP article for detailed description of methods and when to use them.
Of course the state of the page can also depend on values stored in cookies or session.
Contrary, the POST method usually passes values in the body of HTTP request. That makes the state of application after a request via POST method unique and unrepeatable. This makes the POST request suitable for modifications of data or other one time actions. And because you do not want to modify same record multiple times, you usually tell the browser to redirect to another URL in your code after handling the POST request. This is explained in the delete chapter.
In the case when you do not redirect using Location header after POST request, the browser behaves a bit differently:
- When the user presses enter key in address bar or navigate button, the browser just tries to fetch current URL with GET method. This can lead to an error if your application cannot handle the GET request to a POST route.
- After pressing F5 key or reload button, the browser asks with a dialog whether to repeat the request with same payload of data or not. The user is told in the dialog that it might not be a good idea. It might be useless or even inappropriate to repeat a request as the action was already performed once.
The POST request also has a URL which can hold some parameters. Sometimes you do not need to pass any values in the
body, you just want to exploit the behaviour of the browser for POST method requests (to delete a record you can
simply use POST route with id parameter in URL). Or maybe you want to have two routes with same URL but with
different functionality for each HTTP method (e.g. use GET to display a form and POST to process submitted values).
Task – observe browser behaviour after POST request
Create a GET route with a simple form which sends some data to a POST route. The post rout should not redirect.
You can simply print incoming data using print_r() function. After form submission press reload and observe browser’s
warning message about form re-submission.
Route definitions in src/routes.php:
<?php
$app->get('/render-form', function(Request $request, Response $response, $args) {
    return $this->view->render($response, 'post-demo.latte');
});

$app->post('/show-form-data', function(Request $request, Response $response, $args) {
    echo "Press F5 now<br><pre>";
    print_r($request->getParsedBody());
    echo "</pre>";
})->setName('showData');
Form template in templates/post-demo.latte:
{extends layout.latte}

{block title}Form test{/block}

{block body}
<form action="{link showData}" method="post">
    <input type="text" name="a">
    <input type="number" name="b">
    <input type="submit" value="Send">
</form>
{/block}
Anatomy of URL
You know the URL from browser’s address bar, but usually you see only required parts of the URL. The URL can contain much more information:
- protocol –
http://,https://,ftp://, … - username and password (optional) –
user:pass+@ - server address or hostname –
something.com,127.0.0.1, … - port (optional) –
:+8080 - path –
/,/path/to/folder,/path/to/file.php, … - query (optional) –
?d=123&confirm=t - hash (optional) –
#anything
And here is an example: http://user:password@server.com:123/path/to/a/file.php?query=param#hashValue
Task – try to build full URL to you devel folder
Make a URL with login and password which can be used to open your /~xlogin/devel folder on Akela server.
You should be able to open your /devel folder without filling authentication popup dialog using this URL.
Use anonymous browser window to avoid storing your password in local browser history.
You should come up with something like this: https://xlogin:password@akela.mendelu.cz/~xlogin/devel.
It is obviously not a good idea to share such URL with anybody as the login and password is clearly visible in plain text.
Building URLs with parameters
You typically need to build URLs in templates (in <a> and <form> tags) and less often in PHP code to perform
a redirect.
In templates use {link} macro introduced in the walkthrough chapter called named routes.
The {link} macro does not allow to define query parameters but you can simply define them as any other variable
substitution in a template:
<a href="{link nameOfRoute}?id={$id}">Click me!</a>
Or with more parameters:
<a href="{link nameOfRoute}?id={$id}&value1=123&value2={$another}">Click me!</a>
In PHP code, you usually use Location header to redirect (but there are some other ways – you can generate <meta>
tag in the <head> section of page with http-equiv="refresh" and content attribute to achieve redirect too).
As described in named routes chapter, you should use the router object to generate
URLs (docs). Again, the pathFor() method generates a simple
string with URL so you can append a query parameters easily using the string concatenation operator.
$app->post('/some/route', function(Request $request, Response $response, $args) {
    $id = $request->getQueryParam('id');
    //do some DB stuff
    return $response->withHeader(
        'Location',
        $this->router->pathFor('anotherUniqueRouteName') . '?id=' . $id
    );
})->setName('uniqueRouteName');
The function of Location header is simple: once backend pushes such header into the response, the browser executes
a new HTTP request using GET method and downloads and displays content from new location. The actual response is
usually rendered for a very short moment (it might seem that it is not rendered at all). This makes reading of
occasional error reports difficult (hint: use logger or disable the Location header for a while).
Use getQueryParam('paramName') method on $request object to obtain value of selected parameter. More info in the
framework docs.
Using route placeholders
Slim framework router can use placeholders
in route definitions. Placeholders are named slots in the route path and you can substitute them with a value. You can
use them similarly as query parameters. Following route definitions have placeholders for mandatory id and optional
filter values. Use $args array to access placeholder values.
$app->get('/show/user/{id}', function(Request $request, Response $response, $args) {
    $id = $args['id'];
})->setName('uniqueRouteName');
$app->get('/show/user/{id}[/{filter}]', function(Request $request, Response $response, $args) {
    $id = $args['id'];
    $filter = isset($args['filter']) ? $args['filter'] : null;
})->setName('uniqueRouteName');
You need to supply values as associative array to build a URL for a route with placeholders.
<a href="{link uniqueRouteName ['id' => $id, 'filter' => '2018']}">Click me!</a>
$app->post('/process/{id}', function(Request $request, Response $response, $args) {
    $id = $args['id'];
    //do some DB stuff
    return $response->withHeader(
        'Location',
        $this->router->pathFor('uniqueRouteName', ['id' => $id, 'filter' => '2018'])
    );
});
Be careful when using placeholders. You can easily define very general route definition ($app->get('/{anything}', function() { ... })
which would automatically collect all incoming requests belonging to other routes.
Passing POST data
This is rather simple – use <form> with method attribute set to post and remember that you can also use the
action parameter which specifies the URL for form submission. If you specify no action parameter, then the
current location (the URL of currently displayed page with parameters, if present) is used as value for action
parameter (the form is submitted to POST route with same URL).
Current location is used as action attribute value:
<form method="post">...</form>
Action with route URL generated by link macro and a query parameter:
<form method="post" action="{link routeName}?id={$id}">...</form>
To access POST data use method getParsedBody() of $request object. It returns an associative array with keys
and values given by form input fields. Accessing data or route placeholders from URL is same as in previous case
(i.e. getQueryParam() method and $args array).
Checking incoming data
Sometimes you may not be sure whether a form or a link passed data correctly. One way is to use developer tools in your browser and other is to print contents of variables directly to the browser.
To check incoming data in a POST route use print_r() or similar function:
$app->post('/...', function(Request $request, Response $response, $args) {
    $data = $request->getParsedBody();
    print_r($data);     //prints contents of request body
    exit;               //stops execution so you can examine it
});
Query parameters can be observed directly in address bar of your browser.
In both cases an exit; command can be placed into body of problematic route to prevent redirect or rendering
of a template.
A very common mistake is a misspelled variable name or forgotten variable – either way it is a unknown variable
from template engine’s point of view. The error is visible while you hover mouse over the <a> tag in the lower
corner of your browser, directly in the input in some cases or in source code (especially for inputs with type
set to hidden).
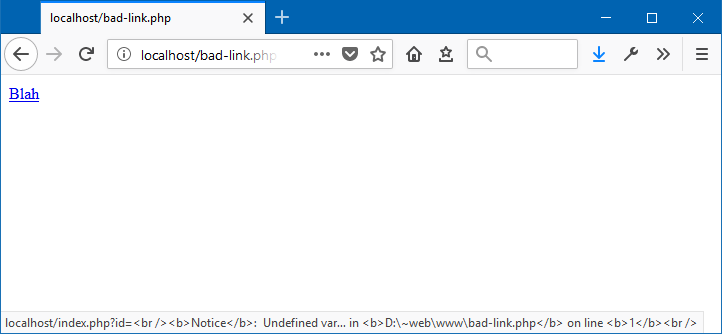
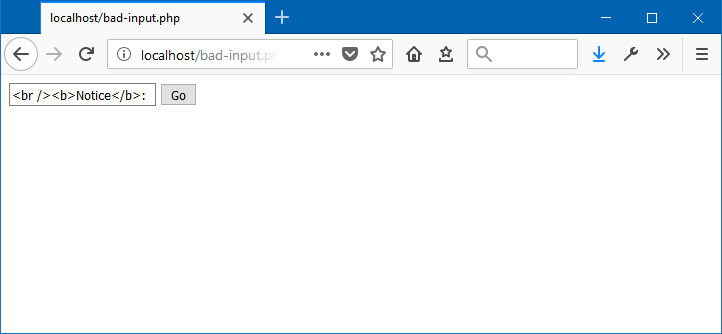
<a href="{link routeName}?id={$di}"> <!-- misspelled $id variable -->
<input type="text" name="something" value="{$etxt}"> <!-- misspelled $text variable -->
This kind of error is a tricky one, because you usually see the error warning after you click the link or submit the form and you wonder why you received a warning text instead of something meaningful (like numeric ID). In this moment, you have to take one step backwards and check the generated code on previous page because the value was lost in previous step.
This is due to a nature of HTTP protocol – its statelessness requires you to pass many values in URL or in form fields and sometimes you forget or misspell variable names.
Task – build a multiple step form to add person’s contact information
Create a chained process to add a contact of a person. You have to pass ID of person from one route to another to successfully add a contact.
- Start from person list template – create a button which redirects the visitor to a page with a form where he should
select the contact type and fill the contact value. In here you have to specify person ID and pass it to following
route. Make up some name for the route (something like
addContact). - Prepare a GET route which will display the form and give the route a name you made up in previous step. Remember
to load contact types from database and forward them along with person ID into template.
- Optionally list all contacts of a person with their types.
- It is also a good idea to display person’s name on this page. You have ID, fetch name and surname from database.
- Remember that you have to forward ID from query parameter to template variables (essentially use
$tplVars['id'] = $request->getQueryParam('id');).
- Prepare a form which will submit the data using POST method.
- Add
<select>element and generate options for contact types. - Add text input to enter contact value.
- To pass person’s ID you have three options:
- Do not specify action attribute of form and make use of the fact, that ID of person is in URL from previous page load. In following POST route, you will find the ID in query parameter.
- Specify action attribute using
{link addContact}and append ID of person manually:<form action="{link addContact}?id={$id}" method="post">. In the following POST route, the ID is again a query parameter. - Use hidden input element to pass ID in POST data along with the rest of input fields values. In the following
route, the ID of person will be accessible as a key in associative array obtained using
$request->getParsedBody().
- Add
- Create a POST route without a name but with same URL as GET route. It will fetch ID of a person either from query
or from
$requestobject with ID of contact type and contact value and insert them into the database. - Redirect back to GET route and append ID of person using
.(dot) operator. - You can create a delete button (a POST form) in contact list to delete contacts.
New button in index.latte – using query parameter to pass ID:
...
<td>
    <a href="{link addContact}?id={$person['id_person']}">Add contact</a>
</td>
...
New GET route in routes.php:
<?php
$app->get('/add-contact', function(Request $request, Response $response, $args) {
    //get id parameter from query
    $id = $request->getQueryParam('id');
    if(empty($id)) {
        exit('Specify person ID');
    }
    try {
        /* select all contacts of given person and print them
        $stmt = $this->db->prepare('...');
        $tplVars['contacts'] = $stmt->fetchAll();
        */
        $stmt = $this->db->query('SELECT * FROM contact_type ORDER BY name');
        $tplVars['types'] = $stmt->fetchAll();
        $tplVars['id'] = $id;   //pass ID into template
        return $this->view->render($response, 'add-contact.latte', $tplVars);
    } catch (Exception $e) {
        $this->logger->error($e->getMessage());
        exit('Loading contact types failed.');
    }
})->setName('addContact');
Template with add form add-contact.latte:
{extends layout.latte}

{block title}Add contact{/block}

{block body}
    <!-- print list of contacts with type here and add a delete button -->
    <!--
    <form method="post">
    OR
    <form action="{link addContact}?id={$id}" method="post">
    -->
    <form action="{link addContact}" method="post">
        <!-- hidden input with ID -->
        <input type="hidden" name="id" value="{$id}">
        <label>Contact type</label>
        <select name="idct">
            {foreach $types as $ct}
                <option value="{$ct['id_contact_type']}">{$ct['name']}</option>
            {/foreach}
        </select>
        <br>
        <label>Contact</label>
        <input type="text" name="contact">
        <br>
        <input type="submit" value="Add contact">
    </form>
{/block}
New POST route in routes.php:
<?php
$app->post('/add-contact', function(Request $request, Response $response, $args) {
    $data = $request->getParsedBody();
    if(!empty($data['id']) && !empty($data['idct']) && !empty($data['contact'])) {
        try {
            //insert contact into database
            $stmt = $this->db->prepare('INSERT INTO contact
                                        (id_contact_type, id_person, contact)
                                        VALUES
                                        (:idct, :id, :c)');
            $stmt->bindValue(':id', $data['id']);
            $stmt->bindValue(':idct', $data['idct']);
            $stmt->bindValue(':c', $data['contact']);
            $stmt->execute();
        } catch (Exception $e) {
            $this->logger->error($e->getMessage());
            exit('Inserting contact failed.');
        }
    } else {
        exit('Specify required parameters.');
    }
    return $response->withHeader('Location', $this->router->pathFor('addContact').'?id='.$data['id']);
})->setName('addContact');
Here is an image that describes the journey of ID person value around the process (click to enlarge):

Summary
This chapter of the book taught you how to build URLs and how to pass values using GET and POST HTTP methods. Everything that you read here is recapitulation from previous chapters or logical extension of knowledge that you already have. I just wanted to put all the information related to URLs and value passing to one place.
Remember that the {link} macro or router’s pathFor() method simply generates a string – an URL for a route. You can
append query parameters to that URL very easily.
New Concepts and Terms
- GET vs POST
- passing values via URL parameters
- passing values via POST data
- route placeholders
Control question
- When to use POST or GET method?
- What is the easiest way to check incoming data?
- How to determine the source of error (e.g. missing ID)?