JavaScript
- JavaScript basics
- Linking JavaScript to your HTML
- Variable scope
- Timers
- Classes and inheritance
- Promises
- Famous jQuery and other libraries
- Summary
In this article I want to introduce to you a client-side programming language called JavaScript. Client-side means, that scripts written in this language are executed in a web browser (client). This is a new concept for you which opens a lot of possibilities: you know that a browser is capable of rendering HTML with CSS, displaying images, maybe you know that you can also play video and audio in newer browsers using appropriate HTML tags (all this is very nice, but still the browser is a bit stupid). Executing scripts in the browser during the time when a visitor is viewing your website can improve his experience a lot. Just hiding or showing some HTML elements or changing some CSS styles dynamically can substantially improve (or reduce) readability of your page and increase speed of browsing (visitors do not have to wait for the server to process their requests).
A lot of pages use JavaScript very heavily nowadays. Sites like YouTube, Google drive/docs, Facebook are mostly built using this technology. When you transfer significant part of program logic into JavaScript, you can deliver desktop-app experience to your users. This architecture is called Single Page Application (SPA).
JavaScript itself is more than a language – it is a package of browser interface functions, HTML manipulation functions and the language itself is called ECMAScript. It has versions such as HTML or CSS and it evolves. Current version is 6 (published in 2015) often labeled as ES 2015 (ECMAScript 2015 – 6th Edition). Be careful when using ES 2015 features as they might not be supported in all browsers (even in recent versions like IE 10/11).
A good source of information about JavaScript is Mozilla Developer Network (MDN) page.
JavaScript basics
JavaScript is often misunderstood language, it has syntax similar to Java, PHP or C++; its name refers
to Java but it is much different. JavaScript is object oriented like Java, but definition of a class
is not familiar at all. It has first-class functions (a function which can be stored in a variable) and
it is dynamically typed (variable type is defined by content like in PHP). Complex source code written
in JavaScript is much different to anything you probably know thanks to heavy use of anonymous functions.
I will start with some basic examples which I believe would not confuse you at all; console.log() sends
its output to browser’s developer tools console (usually activated by F12 key).
Here is a brief JavaScript demo and an overview of basic syntax and types:
/* basic variables */
var stringVariable = "Hello world";
var numberVariable = 1.2345;
var boolVariable = false;
console.log(stringVariable, numberVariable, boolVariable);
/* arrays */
var arrayVariable = [1,2,3,4,'This is an array', false, true, [10,20,30]];
console.log(arrayVariable);
/* reference to a function */
var functionVariable = function(param) {
    alert(param);
};
functionVariable("Call a function");
/* object */
var objectVariable = {
    key: "value",
    number: 123,
    nestedObject: {
        boolean: false
    },
    method: functionVariable
};
console.log(objectVariable);
console.log(objectVariable.number);
objectVariable.method("Calling a method of object.");
To try JavaScript code you do not have to write a custom HTML page, just paste this code into online tool such as JSFiddle (use JavaScript editor) or Plunker and click run. Remember to open that developer tools console when you work with JavaScript.
Data types
JavaScript is dynamically typed like PHP. We have basic types: strings, numbers, booleans and also arrays (only ordinal) and general objects. Unlike in PHP, even basic types are objects, for example you can call methods or access object’s attributes on strings like this:
var chars = "a,b,c,d,e,f".split(',');   //divide string to array
console.log(chars, chars.length);       //print array and its length
var len = "some string".length;         //get length of string...
console.log(len);                       //...and display it
There is also not much difference between creating a string via String class constructor or string literal:
var s1 = "some string";
var s2 = new String("continues here");
console.log(s1 + s2);
JavaScript is more strict with type conversions than PHP (or just different), sometimes you have to use
parseInt() or parseFloat() functions to convert string variable into number:
var a = "5";
var b = 8;
console.log(a + b);             //string 58
console.log(parseInt(a) + b);   //number 13
There is no special operator to concatenate string like in PHP (the . operator). Maybe it is not a very good idea
to compare JavaScript with PHP because they languages with different history and background. But they are both used
to develop web pages.
Declaring functions
Basic declaration of a function is straightforward.
function something() {
}
something();    //call that function
But then you can notice, that such declaration can interfere with a variable declaration if you use same name (variables’ and functions’ identifiers are stored together although variables have higher priority):
var fun = "a string";
function fun() {
}
fun();                  //error, fun is already a string!
console.log(fun);       //outputs 'a string'
In JavaScript, you can store functions into variables and also work with them in such way. Function is also an object with methods in JavaScript. This is called first-class functions. Next example shows even an anonymous function passed into another function as argument’s value.
//store function into a variable
var fun1 = function(fun2) {
    fun2();
};  //note the ; this line is just and assignment of a value to a variable
//call that function with another as parameter
fun1(function() {
    console.log('this gets also called');
});
Control structures
In following example you can see basic control structures if and for. There is also a while loop and a switch
statement.
var x = 5;
if(x < 15) {
    console.log("x is smaller than 15");
} else {
    //...
}
var arr = ["a", "b", "c", "d", "e", "f"];
for(var i = 0; i < arr.length; i++) {
    console.log(arr[i]);
}
There was no PHP’s foreach equivalent in JavaScript for a long time – you would have to use plain for cycle
and obtain array’s length. There is a new for...of loop
in ES 2015 and array method forEach()
to iterate over all array items (this one was standardized earlier). You can use for...in loop
to iterate over all object’s properties.
//iterating in array using for...of (new)
var arr = [1,2,3,4,5,6];
for(var i of arr) {
    console.log(i);
}
//another type of iteration using forEach and arrow expression (new in ES 2015)
arr.forEach((i, k) => {
    console.log(i, k);
});
//iterating over object's properties using for...in
var obj = {
    prop1: 'val1',
    prop2: 2
};
for(var k in obj) {
    console.log(k, obj[k]);
}
It is possible to iterate array items with for...in cycle, but it is wrong and should be avoided (it treats
numeric array keys as strings for instance and does not guarantee order of items).
The arrow function expression (a, b) => {...}
is just a shortcut to declare an anonymous function. There is one important difference against a declaration using
function() {} that I will explain later.
Variable and constant declarations
In older JavaScript versions you could have used only var keyword to denote a new variable. A variable declared
using var is local in functions and global outside of them.
var global = "this is a global variable";
function something() {
    var local = "this is a local variable";
    console.log(global, local); //OK
}
something();
console.log(global);    //OK
console.log(local);     //error
In fact, JavaScript scans the function body and moves all variable declarations to the beginning.
New JavaScript version ES 2015 introduced also const and let keywords. The let keyword is interesting because
it can create variable which scope is only inside curly brackets, observe difference between these two pieces of code:
//using var
for(var i = 1; i < 5; i++) {
    console.log(i); //1,2,3,4
}
console.log(i); //5
//using let
for(let j = 1; j < 5; j++) {
    console.log(j); //1,2,3,4
}
console.log(j); //error
Linking JavaScript to your HTML
Similarly to CSS, a JavaScript file is usually referred in <head> tag using a <script> tag. But you can generally
place the <script> tag anywhere inside the <body> element. The <script> tag can contain a src attribute with
an URL to download some JavaScript source code or the tag can contain some JavaScript code directly:
<!DOCTYPE html>
<html>
<head>
    <meta charset="utf-8" />
    <title>JS example</title>
    <script type="text/javascript" src="link/to/external/file.js"></script>
    <script type="text/javascript">
        console.log("Some JS code right here...");
    </script>
</head>
<body>
<script type="text/javascript">
    console.log("...or even in document's body.");
</script>
</body>
</html>
Order and time of execution
When you add <script> tags to your HTML, you might wonder when is JavaScript code executed.
Basically the order is given by occurrence of <script> tags. Big difference is between
scripts in the <head> and inside the <body> as those scripts in the <head> do not have access
to HTML elements because those were not rendered by browser yet. On the other hand <script>
tags inside the <body> element have access to HTML elements in markup above itself.
Therefore there is a big difference in placement of <script> tags within your HTML code:
<!DOCTYPE html>
<html>
<head>
    <meta charset="utf-8" />
    <title>JS example</title>
    <script type="text/javascript">
        var element1 = document.getElementById("test");
        console.log(element1);  // -> null
    </script>
</head>
<body>
<div id="test"></div>
<script type="text/javascript">
    var element2 = document.getElementById("test");
    console.log(element2);  // -> element2
</script>
</body>
</html>
Web developers often want their JavaScript to execute when all HTML tags are loaded into browser.
To achieve this an event called onload is used and most JavaScript code is executed in it.
When you use onload event it does not matter whether you put your <script> tag into <head> or
just before </body>. I will tell you more about events later.
Interacting with HTML elements
You obviously have to interact with existing (static) HTML structure somehow to achieve dynamic behaviour. Your browser has capability to project changes in HTML structure, HTML attributes and CSS thanks to dynamic HTML technologies. This means that you can append/remove/modify HTML elements using JavaScript and your browser will draw these changes immediately on the screen. You do not have call any function to request repaint elements’ new state.
To obtain an HTML element from document’s structure use one of the following functions:
document.getElementById("id_value")– returns one element found by itsidattributedocument.getElementsByTagName("table")– returns collection of elements by given tag namedocument.getElementsByClassName("some-class")– returns collection of elements by given class attributedocument.querySelector(".some-css-selector")– returns first element matched by given CSS selectordocument.querySelectorAll(".some-css-selector")– returns collection of elements matched by given CSS selector
To access standard HTML attributes of retrieved elements just type element.attr (e.g. console.log(link.href) for
<a> element). An exception is class attribute which is accessed using element.className. To change CSS styles use
element.style object followed by camelCase style name (e.g. CSS property background-color can be accessed with
element.style.backgroundColor). Another special attribute is innerHTML which can be used to change content of an
element. You might remember about user defined attributes which are found
under element.dataset.* field.
Document object (DOM – Document Object Model)
Those document.* methods mentioned before are part of DOM.
It is an object that contains structure of HTML elements presented by the browser and also methods/attributes to
manipulate them. It contains a key called body which is a reference to HTML <body> element (there is also head
attribute, but that is not used often). The document contains nested HTML elements in childNodes attribute
collection. Every other child has childNodes attribute too – they form a tree. DOM is standardized by W3C.
console.log(document.head);
console.log(document.body);
console.log(document.childNodes); //only <html> node
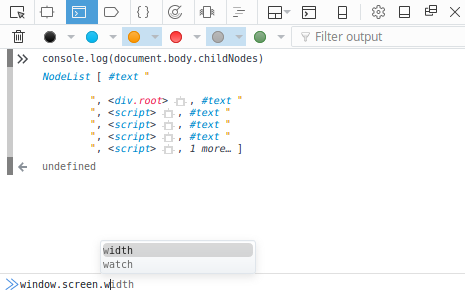
console.log(document.body.childNodes); //body's child nodes
Try to type some of those lines mention above into console (in the very bottom of the console you can write actual JavaScript commands).
Each node in DOM has methods and attributes, most important ones are:
- node.appendChild() – insert an element as a
child of
node(new element will be last child) - node.removeChild() – remove given element from
child collection of
node - node.insertBefore() – insert an element before
another child of
node(similar toappendChild) - node.childNodes
- node.firstChild – first child of
node, can be used to insert new element as first child usingnode.insertBefore(newNode, node.firstChild) - node.lastChild – last child of
node - node.parentElement – parent element of
node
There is a difference between DOM Node and DOM Element, elements are only HTML tags, nodes are also texts between elements and other stuff. You will encounter elements most of the times, DOM Element inherits methods and properties from the DOM Node.
To create an element use var newElem = document.createElement('tag_name') method.
You can find special collections like document.forms,
document.scripts or document.links
on document object.
Window object (BOM – Browser Object Model)
The window variable represents current browser’s window
or tab. It is the main variable in JavaScript, when a JavaScript interpret encounters unknown variable, it looks
for it in set of window object’s properties.
console.log(window);
console.log('This is same...', document);
console.log('...as this', window.document);
window.anything = "can be used as global variable";
console.log(anything);
Be careful with names of global variables – you can easily overwrite some predefined global variables like console,
screen (information about screen size), document (the DOM), history (window history), location (current URL in
address bar)… Some more information about current browser can be found in widnow.navigator property.
Following example nicely demonstrates that JavaScript scans for var declarations and moves them to top. You would
expect to output document object on first line but JavaScript outputs undefined because the variable has not
been assigned a value yet.
console.log('No content', document);    //strange!
var document = "not a document anymore";
console.log('Still works', window.document);
console.log('New content', document);
JavaScript events
Events are type of signals which are broadcasted to JavaScript event listeners (functions) when some action takes place. For example a user can click a button, press a key, resize or scroll the window, navigate to another site or move a mouse. There are also events that are not associated directly with user actions, it can be timer ticks or when the browser finishes loading of the page or particular image:
<script type="text/javascript">
    function clickButtonHandler(event) {
        console.log('Button clicked', event);
    }
</script>
<button onclick="clickButtonHandler(event)">Click me - console.log()!</button>
<button onclick="alert('Hello!')">Click me - alert()!</button>
Open developer console (F12) and try to click this button or the other:
You should see something like this in developer console:

That weird stuff which is logged along with ‘Button clicked’ text is an event object describing
what happened. Event object also has methods: most used ones are event.preventDefault() to prevent
browser from executing default actions (form submission, navigation, typing…) and event.stopPropagation()
to stop processing event (in case that more handler functions are registered to same event). Special event
is onload of <body> element which signals that whole page is loaded (but it can be also attached to
particular <img> elements).
You can attach events as an HTML attributes like in example above or you can use programmatic approach which is much cleaner because it won’t complicate your HTML code:
<!DOCTYPE html>
<html>
<head>
    <meta charset="utf-8" />
    <title>JS events example</title>
</head>
<body onload="console.log('this won\'t happen');">
<script type="text/javascript">
    //because this one overrides onload attribute
    window.onload = function() {
        //you can attach only one event with this approach
        console.log("Executed when everything is loaded.");
    };
    //this approach allows to attach more handlers to one event
    window.addEventListener("load", function() {
        console.log("Ev handler 1");
    });
    window.addEventListener("load", function() {
        console.log("Ev handler 2");
    });
</script>
</body>
</html>
The reason why we used Latte templates was to divide program logic and view logic. It is the same with JavaScript: you should not mix HTML and JavaScript code. Ideally put all JavaScript into separate file(s) and use it to attach all event handlers.
A good example which shows how to completely divide HTML and JavaScript code follows.
<form action="..." method="post" data-confirm-message="Really delete person?">
    <input type="submit" value="OK" />
</form>
window.addEventListener("load", function() {
    //find all forms with data-confirm-message attribute
    var forms = document.querySelectorAll("form[data-confirm-message]");
    for(var i = 0; i < forms.length; i++) {
        //register submit event handler
        forms[i].addEventListener("submit", function(event) {
            if(!confirm(this.dataset.confirmMessage)) {
                //prevent form from submission
                event.preventDefault();
            }
        });
    }
});
When you use formElement.addEventListener('submit', ...) to register an event, you have to prevent the browser from
submitting the form by calling eventObject.preventDefault() inside handler instead of returning false like mentioned
in walkthrough example.
It is possible to work with special variable called this inside event handlers. That variable holds reference to an
HTML element which fired event.
<!DOCTYPE html>
<html>
<head>
    <meta charset="UTF-8">
    <title>Using variable this in events</title>
    <script type="text/javascript">
        //general function which cahnges text inside element
        function changeText() {
            //thnaks to variable this you do not have to detect the button
            console.log(this);
            this.innerHTML = "Clicked button";
        }
        window.addEventListener('load', function() {
            //find elements
            var btns = document.getElementsByTagName("button");
            //attach event to all of them
            for(var i = 0; i < btns.length; i++) {
                btns[i].addEventListener('click', changeText);
            }
        });
    </script>
</head>
<body>
    <button>Not clicked button</button>
    <button>Not clicked button</button>
    <button>Not clicked button</button>
</body>
</html>
The this variable has different meanings in different situations:
- in event handlers it contains reference to an HTML element
- in global function it same as the
windowvariable - in methods of objects it contains reference to current instance
It is possible to change this variable content by using function’s methods call()
or apply().
Removing events
Sometimes you need to detach an event in JavaScript code. You can simply do that by calling
element.removeEventListener(eventHandler)
method in your code. You cannot use anonymous function in this case because you need a reference to eventHandler.
var element = document.getElementById("...");
var eventHandler = function() {
    console.log("click");
    //remove the click handler
    this.removeEventListener("click", eventHandler);
};
element.addEventListener("click", eventHandler);
Variable scope
It is not unusual to see a function declared inside another function in JavaScript code. It can happen when you need to pass callbacks or event handlers. In such case, function declared inside another has access to variables from outer scope.
window.addEventHandler("load", function() {
    //variable is declared here (it is local for onload handler)
    var a = "variable a";
    var btn = document.getElementById("...");
    btn.addEventListener("click", function() {
        //click handler has also access to that variable
        console.log(a); //outputs 'variable a'
    });
});
This is useful, but be careful when you want to attach same event to multiple HTML elements with a variable which changes its content in outer scope – weird stuff starts to happen.
window.addEventListener("load", function() {
    //find multiple buttons...
    var allButtons = document.getElementsByTagName("button");
    for(var i = 0; i < allButtons.length; i++) {
        //...attach an event to each of them
        allButtons[i].addEventListener("click", function() {
            //logs last value of i, not individual values
            console.log(i);
        });
    }
});
It does not matter on whichever <button> element you click, you always get last value of variable i in console
because the handler is executed after the for loop and variable i already changed its value to allLinks.length.
In another words, there is only one variable i with one value in computer’s memory and all event handlers
refer to it. You either have to use the let keyword or construct a closure.
window.addEventListener("load", function() {
    function makeEventHandler(val) {
        /*
            return function which will serve as event handler, variable
            val is locked to value given when executing makeEventHandler
        */
        return function() {
            console.log(val);
        }
    };
    var allLinks = document.getElementsByTagName("button");
    for(var i = 0; i < allLinks.length; i++) {
        //call a function which generates the event handler
        allLinks[i].addEventListener("click", makeEventHandler(i));
    }
});
Thanks to let keyword we can use almost same code as originally intended:
window.addEventListener("load", function() {
    var allButtons = document.getElementsByTagName("button");
    for(let i = 0; i < allButtons.length; i++) {
        //variable i is different for each iteration
        allButtons[i].addEventListener("click", function() {
            console.log(i);
        });
    }
});
Lets return a bit and talk about this variable again. Put yourself into a situation when you need to register event
handlers based on user action (inside another event handler). Perhaps you need a <button> which generates new HTML
content and this content is responsible for hiding original <button> element after user performs some consequent
action. It means, that you need to pass reference for the first <button> into event handler attached to second,
newly created one. You know that you can use this in first click event handler
<!DOCTYPE html>
<html>
<head>
    <meta charset="UTF-8" />
    <title>Passing this into nested functions</title>
    <script type="text/javascript">
        function makeClickEvent(container) {
            //return a function which handles first button click
            return function() {
                //insert content into div container
                var firstButton = this;
                var newButton = document.createElement("button");
                newButton.innerText = "Hide first button";
                //attach event which hides original button
                newButton.addEventListener('click', function() {
                    document.body.removeChild(firstButton);
                });
                //insert new button into container
                container.appendChild(newButton);
            };
        }
        window.addEventListener("load", function() {
            //we have 3 buttons and 3 divs
            var btns = document.getElementsByTagName("button");
            var divs = document.getElementsByTagName("div");
            for(var i = 0; i < btns.length; i++) {
                btns[i].addEventListener("click", makeClickEvent(divs[i]));
            }
        });
    </script>
</head>
<body>
    <button>Show other button</button><div></div><hr />
    <button>Show other button</button><div></div><hr />
    <button>Show other button</button><div></div><hr />
</body>
</html>
This can also be achieved with arrow expression () => {} mentioned before. This kind of function declaration
does not introduce its own this variable and you can use this from parent scope.
<!DOCTYPE html>
<html>
<head>
    <meta charset="UTF-8" />
    <title>Passing this into nested functions</title>
    <script type="text/javascript">
        function makeClickEvent(container) {
            //return a function which handles first button click
            return function() {
                //insert content into div container
                var newButton = document.createElement("button");
                newButton.innerText = "Hide first button";
                //attach event which hides original button
                newButton.addEventListener('click', () => {
                    document.body.removeChild(this);
                });
                //insert new button into container
                container.appendChild(newButton);
            };
        }
        window.addEventListener("load", function() {
            //we have 3 buttons and 3 divs
            var btns = document.getElementsByTagName("button");
            var divs = document.getElementsByTagName("div");
            for(var i = 0; i < btns.length; i++) {
                btns[i].addEventListener("click", makeClickEvent(divs[i]));
            }
        });
    </script>
</head>
<body>
<button>Show other button</button><div></div><hr />
<button>Show other button</button><div></div><hr />
<button>Show other button</button><div></div><hr />
</body>
</html>
Timers
There are two types of timers in JavaScript – an interval and a timeout. The difference is that interval timer ticks
permanently. The functions which are used to setup interval are similar: setInterval(callback, delay) and
setTimeout(callback, delay). They both return a reference to cancel timer by clearTimeout(ref) or
clearInterval(ref) functions. The delay is specified in milliseconds.
var ref;
function startTimer() {
    var c = 0;
    ref = setInterval(function() {
        console.log(c++);
    }, 1000);
}
function stopTimer() {
    clearInterval(ref);
}
Open developers console and try to click following buttons you should be able to see a number to increment every second:
Classes and inheritance
You can create an instance of an object in JavaScript just by assigning object literal to a variable – var x = {...}.
This approach is not very universal. It is useful to define a class and derive instances of objects from it using
new keyword – this is similar to Java or PHP OOP approach.
Traditional JavaScript (i.e. that one which is executable in all browsers) has unfamiliar class definition based
on prototypes:
//a function which will be used as a constructor
var SomeClass = function(value) {
    this.value = value;
};
//this is a method
SomeClass.prototype.getValue = function() {
    return this.value;
};
//create an instance
var instanceOfSomeClass = new SomeClass(5);
//and call some method
console.log(instanceOfSomeClass.getValue());
Use CamelCase variable names to emphasize that a variable is intended to contain a class definition.
The prototype property of a function object is a container for methods that are mapped to an instance being created
using new keyword. In method’s context, the this variable refers to individual instance. An interesting point is
that you can change prototype of a class and all instances will notice that change even if they were created
before that change. You should not return anything from constructor – JavaScript would use that value as a result
of new operator which is not intuitive. Do not call constructors as regular functions also, that would cause to
create unwanted global variables because this variable points to window object in global function’s context.
Inheritance is achieved by chaining of prototypes, here is a simple example:
//general class
var Rectangle = function(w, h) {
    this.w = w;
    this.h = h;
};
Rectangle.prototype.getArea = function() {
    return this.w * this.h;
};
//specialized class
var Square = function(s) {
    Rectangle.call(this, s, s);
};
//inheritance - must be after constructor and before methods
Square.prototype = new Rectangle();
Square.prototype.constructor = Square;
//now you can define methods which belong only to Square class
Square.prototype.enlarge = function(step) {
    this.w = this.w + step;
    this.h = this.w;
};
var sq = new Square(8);
var rt = new Rectangle(10, 5);
console.log('Square area', sq.getArea());
console.log('Rectangle area:', rt.getArea());
sq.enlarge(2);
console.log('Larger square area:', sq.getArea());
rt.enlarge(2);  //error
The line with Square.prototype = new Rectangle(); is crucial. It simply creates an instance of a Rectangle and assigns
it as prototype of a Square class. This basically makes all Rectangle methods accessible in Square’s prototype. Next
line reverts constructor to Square function, it is not very important and the code works without it but some
constructions depend on it.
Note that new Rectangle() is called without arguments – you should make your constructors in a way that this fact does
not raise fatal errors (or pass the needed values).
You can use ordinary class and extends keywords
to define classes in new versions of JavaScript.
Promises
Asynchronous nature of JavaScript is often hard to grasp for people who started with backend development in PHP where code execution usually flows from top to bottom. In JavaScript you have to think about the code differently: events are fired in random order according to user’s actions. It means that reading the code from top to bottom does not necessarily end with its understanding.
You can encounter another popular pattern for asynchronous processing called Promise. Implementation of this interface is used to handle asynchronous processes and readability of such code is better. Here is an example.
index.html file of AJAX calculator using a Promise:
<!DOCTYPE html>
<html>
<head>
    <meta charset="UTF-8"/>
    <title>Using AJAX with promises</title>
    <script type="text/javascript">
        window.onload = function () {
            function calculate(a, b) {
                //wrap HTTP communication into promise
                return new Promise(function(resolve, reject) {
                    //this code is executed immediately
                    var request = new XMLHttpRequest();
                    request.onreadystatechange = function () {
                        //see that you can do whatever you want with returned value
                        if (this.readyState == XMLHttpRequest.DONE && this.status == 200) {
                            //resolve should be called on success
                            resolve(this.responseText);
                        } else if (this.readyState == XMLHttpRequest.DONE) {
                            //reject should be called on failure
                            reject();
                        }
                    };
                    request.open("GET", "calculate.php?a=" + a + "&b=" + b);
                    request.send();
                });
            }
            var a = document.getElementById("a");
            var b = document.getElementById("b");
            var btn = document.getElementById("btn");
            var res = document.getElementById("res");
            btn.onclick = function () {
                //call function and register handlers for resolve and reject using then
                calculate(a.value, b.value).then(function(response) {
                    //just show the result
                    var resObj = JSON.parse(response);
                    res.innerHTML = resObj.result;
                }, function() {
                    res.innerHTML = "Error!";
                });
            };
        };
    </script>
</head>
<body>
    <input id="a" type="number" value="5"/>
    <input id="b" type="number" value="3"/>
    <button id="btn">Calculate</button>
    <span id="res"></span>
</body>
</html>
Promises can be chained or they can be stored in an array and treated as one job by usage of method
.all().
Promises can be used to separate different levels of application’s logic – in my example, you can see that low level HTTP communication is separated from result display. Moreover, you can reuse low level function anywhere and build whatever logic over it. The code is more readable and the Promise interface is unified and well-known.
Internet Explorer does not support promises and you have to use some kind of polyfill.
Famous jQuery and other libraries
If you are digging enough around web applications, you definitely heard or read about
jQuery. It is a library which main purpose is to help coders to achieve
desired behaviour faster. In past it also helped to overcome differences in browser’s APIs.
It offers many function for manipulation with HTML, events handling and communication with backend.
It is worth trying but I think that it is not a very good idea to learn jQuery for beginners
because you will have trouble working with pure JavaScript (sometimes called
vanilla JavaScript – this page tries to explain that a JS library
like jQuery is not always needed). The importance of jQuery and similar
facade libraries has declined as various
browsers improved/united their APIs (e.g.: to find elements using CSS selector you can
use document.querySelector() method instead of jQuery, event binding can be done by
element.addEventListener() in all modern browsers instead of jQuery’s $('.selector').click(fn)).
Moreover, new libraries and frameworks like React or
Angular emerged since jQuery’s best times.
Here is the same example of flight reservation form with jQuery style code – notice completely different style of accessing elements via CSS selector which is common in jQuery. This code is not much shorter than in clean JavaScript but in some cases jQuery can shorten your code up to one half of original.
<!DOCTYPE html>
<html>
<head>
<meta charset="utf-8">
<title>Form validation</title>
<script src="https://code.jquery.com/jquery-3.1.1.min.js"
integrity="sha256-hVVnYaiADRTO2PzUGmuLJr8BLUSjGIZsDYGmIJLv2b8="
crossorigin="anonymous"></script>
<script>
$(document).ready(function() {
var flightPrice = 120; //initial price of flight
// calculate price of flight
function updatePrice() {
var price = flightPrice;
//enable additional inputs
var baggageEnabled = $("input[name=baggage]").prop("checked");
$("#baggage_details").prop("disabled", !baggageEnabled);
if(baggageEnabled) {
switch($("select[name=baggage_type]").val()) {
case "1": price += 25; break;
case "2": price += 35; break;
}
price += $("input[name=baggage_oversize]").prop("checked") ? 15 : 0;
}
$("#total").html(price);
}
//checkboxes click events
$("input[name=baggage], input[name=baggage_oversize]").click(function() {
updatePrice();
});
//change of option in baggage_type select
$("select[name=baggage_type]").change(function() {
updatePrice();
});
//call update right after this page loads
updatePrice();
});
</script>
</head>
<body>
<h1>Flight reservation</h1>
<form name="reservation" action="..." method="post">
<label>Name & surname:</label>
<input type="text" name="name" required />
<input type="text" name="surname" required />
<br />
<label>Date of birth:</label>
<input type="date" name="birth" required />
<br />
<label>Include extra baggage:</label>
<input type="checkbox" name="baggage" value="1" />
<br />
<fieldset id="baggage_details" disabled>
<label>Weight & type</label>
<select name="baggage_type" required>
<option value="">Select...</option>
<option value="1">Basic (up to 15kg) + €25</option>
<option value="2">Large (up to 25kg) + €35</option>
</select>
<br />
<label>Include oversized baggage (up to 2m length) + € 15</label>
<input type="checkbox" name="baggage_oversize" value="1" />
<br />
</fieldset>
<p>Total price €<span id="total"></span></p>
<input type="submit" value="Confirm" />
</form>
</body>
</html>
There are also many other JS libraries or frameworks. jQuery is used in most cases and sometimes other libraries (like Bootstrap) require you to include it as well. Be careful about mixing different libraries – some of them cannot or should not be used together.
Moreover, there are also polyfill libraries which are used to simulate behaviour of modern browsers in the older ones. These libraries are used for backwards compatibility of modern web pages with older browsers.
Summary
Remember that JavaScript is executed inside a browser. Therefore it cannot store any data on a server – you always need some kind of backend which can communicate securely with your database. It is possible to write JavaScript backend scripts with Node.js but it really does not matter. Ratio of JavaScript executed inside visitor’s browser and backend code can vary from 99% to 0%. But without some backend code, you cannot create any useful web application. The main effect of this effort is to deliver to your users more dynamic page with better usability.
As you probably noticed, browser’s APIs are quite bulky and not very convenient. Therefore there are JavaScript libraries like jQuery with more effective expression.
Now you know that most visual effect or desktop-application-like behaviour of a website is caused by JavaScript. Another thing to remember is that JavaScript has vast ecosystem of libraries and frameworks and I am not going to get much deeper into this topic in this book.
New Concepts and Terms
- JavaScript
- Document Object Model
- Browser Object Model
- Events
- Objects
- Promise