Styles
- Cascading Style Sheets
- Connecting styles with HTML
- Inheritance & Cascading
- CSS Colors
- CSS Units
- At rules
- Summary
In the previous article, you learned about HTML. You probably noticed that HTML completely lacks any means to define how a HTML document will look. This is where styles come into scene. In this article, I will explain what styles are and how they work.
Although, there was a brief period when HTML allowed changing the visual style of a
document, the truth is that HTML is a language to describe a structure of a document.
HTML has no means to describe visual rendering of a document. This is somewhat counter-intuitive
because when you create an HTML document without any styles, it still renders somehow – e.g.
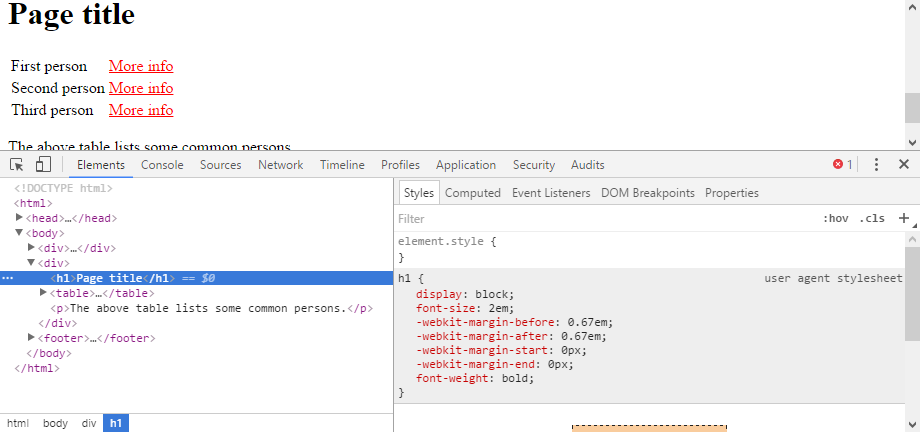
H1 header has larger font size, is in bold and has some margins etc. This is caused by
styles built in a web browser. These are called user-agent styles and are shipped with
every web browser so that it renders an HTML page without styles in some sensible manner.
Cascading Style Sheets
Cascading Style Sheets (CSS) is standard defining the rendering rules for a HTML (or XML or SVG) documents and a language for writing those rules. CSS is not a programming language.
CSS replaces obsolete HTML elements like FONT, BASEFONT, BIG, CENTER, S, STRIKE, U, …
It is being actively developed with varying support among browsers. When you plan using a recent
feature, check its support with various browser tests:
- http://caniuse.com/
- http://www.w3.org/TR/CSS/
- http://acid3.acidtests.org/
- http://css3test.com/
- http://tools.css3.info/selectors-test/test.html
CSS version 2 (2.1) is almost fully supported among all common browsers. Starting with CSS3, the standard is split into modules with various degrees of standardization (earliest 2007). There are dozens of modules: font properties, color, box properties, box model, border, color, margin, background, size and even effects like shadows, transparency, rounded corners or mouse cursor and many more (See CSS Reference).
Page Layout
Creating styles for a full HTML page is quite a complex task. Because a web page is not a piece of paper, the styles must adapt to virtually unlimited number of page (window) sizes. This leads us to responsive design which basically is page design in which the page layout changes with the page size. This means that some elements are shown only when there is enough space for them and other page elements are resized accordingly. Creating a clean good looking responsive page, which displays nicely on desktop with screen resolution 1920 × 1080 as well as on a mobile phone with screen resolution 320 × 480 is really difficult. It is comparable to developing an entire application as it requires design and graphical skills as well as deep understanding of CSS rendering modes and all available options. It also requires fairly good understating of HTML and experience so that you can design a good page layout (not to be confused with layout template).
Simply put, a page layout describes the arrangement (position and sizes) of all page elements (e.g. paragraphs). Luckily, there is plenty of ready to use page layouts which solve this problem. Many of those are available for free and are can be easily customized. So I suggest that you start with any of them rather than trying to develop your own page layout and styles from scratch. However it is still important that you understand how CSS works so that you can customize your template and do little tweaks to it.
CSS Syntax
Even though creating an entire page stylesheet is complicated, the syntax of a CSS file is fairly simple. A CSS document contains rules, selectors and properties and their values. CSS rule is composed of a selector and a set of properties and their values. CSS rule is written down as:
selector {
    property1: value2;
    property2: value2;
}
For example the rule body {color: black;} sets black font color to the <body> element of HTML page.
Any number of properties can be set in a single rule. The properties in a rule are separated by semicolon ;.
The rules are separated by new line, so there is no semicolon after the parentheses.
That’s all. It is still very powerful.
Selectors
A selector is something with selects HTML elements whose properties are modified. There are four basic kinds of selectors:
- element name (type selector) –
a {color: red} - element class (class selector) –
.contact_link {color: grey}- pseudo-classes –
:visited {color: blue}
- pseudo-classes –
- element id (id selector) –
#homepage_contact {color: green} - element attribute (attribute selector) –
input[type=text] {color: black} - universal selector –
*– matches every element.
With the above CSS style:
a {color: red}
a[href='http://anotherexample.com'] {color: magenta}
.contact_link {color: grey}
#homepage_contact {color: green}
:visited {color: blue}
the following HTML document:
<!DOCTYPE html>
<html>
    <head>
    	<link rel='stylesheet' href='style-1.css'>
        <meta charset='UTF-8'>
        <title>CSS example</title>
    </head>
    <body>
        <a href='http://example.com'>Some link</a>
        <a href='http://anotherexample.com'>Another link</a>
        <a href='http://example.com' class='contact_link'>Contact link</a>
        <a href='http://example.com' id='homepage_contact'>Homepage Contact link</a>
    </body>
</html>
will display like this (when the link is not visited):

And when the link is visited, the HTML document will display like this:

I will explain why all of the links are not blue in a moment.
Pseudo-classes
Pseudo-class selectors refer to things which cannot be easily represented
in the HTML language. A typical example is the :visited selector, which
selects visited HTML links. This is something which refers to the state of the
browser and there is no way to represent it in the HTML code itself.
There are a number of other pseudo-classes (full list):
:link– unvisited link:visited– visited link:active– active link:focus– focused input:checked– checked input, same asinput[checked]:disabled– disabled input, same asinput[disabled]:valid– valid input:invalid– invalid input:required– required input, same asinput[required]:first-child– first matched element in the same parent, e.g.:li:first-childselects first<li>:nth-child(2)– second matched element in the same parent:nth-child(even)and:nth-child(odd)– even and odd elements:nth-child(3n+2)– every third beginning from the second element
Combining Selectors
The CSS selectors may be quite freely combined. Common combine operators (combinators) are:
- nothing – a logical and – If both first and second selector apply, the element properties are modified.
- colon
,– a logical or – If either first or second selector applies, the element properties are modified. - space – descendant – Properties are modified for the elements selected by the second selector which is applied only within the elements selected by the first selector.
- greater
>– direct child – Properties are modified only for elements selected by the second selector which is applied only to direct children of elements selected by the first selector. Now, it really becomes vital to understand the hierarchical structure of HTML page. - tilde
~– sibling – Properties are modified for the elements selected by the second selector if that element is preceded by a sibling element satisfying the first selector. - plus
+– adjacent sibling – Properties are modified for the elements selected by the second selector if that element is immediately preceded by a sibling element satisfying the first selector.
Selector combinations examples:
ul, ol– selects all elements that are eitherulorol,ul li– selects all elementslithat are contained inul,ul>li– selects all elementslithat are direct children oful,ul.menu– selects all elementsulthat have classmenu(logical and),ul.menu a:visited– selects all visited links inside allulelements that have classmenu,li#special a:visited– selects all visited links with inside alllielements which have idspecial(there should be only one).li ~ li– selects alllielements which are preceded by some other siblinglielement.
You will see those selectors in action in an example.
Vendor prefix
Properties, which are not fully standardized yet, or which are not implemented up to the standard may be available with a vendor prefix. For example:
.shadow {
    -webkit-box-shadow: 5px 5px 5px 5px #888; /* old Safari and Chrome */
    -moz-box-shadow: 5px 5px 5px 5px #888; /* old Firefox */
    box-shadow: 5px 5px 5px 5px #888; /* all browsers that support this feature */
}
There can be a bit of confusion about support of newest CSS properties in different web browsers. The vendor prefixes are used for CSS properties which behavior is marked as experimental by the authors of that web browsers. The important part here is that a web browser simply ignores all properties it does not understand. Therefore the above code works, because
- A browser that supports
box-shadowproperty ignores both-webkit-box-shadowand-mox-box-shadow. - An old version of Firefox that does not understand the
box-shadowproperty will read the-mox-box-shadowand ignore thebox-shadowand-webkit-box-shadow. The result it not guaranteed to be the same.
Using vendor prefixed properties is generally discouraged. They should be used if you want to be an early adopter of that particular feature or if you need to support older versions of some browsers. Thought it is better to use a polyfill.
Connecting styles with HTML
Because HTML and CSS are two completely different (and quite unrelated) languages. You have to connect them somehow. There are basically three options:
- link to an external file,
- inside a
<style>element, - inside a
styleattribute (inline).
All three approaches may be freely combined within a HTML page.
External file
Linking to external stylesheet is done using the link element in page head:
<!DOCTYPE html>
<html>
    <head>
        <link rel='stylesheet' type='text/css' href='style.css'>
        <title>SomePage</title>
        <meta charset='UTF-8'>
        ...
    </head>
    <body>
    ...
    </body>
</html>
The href attribute is the URL of the style sheet. In the above case, it is
relative URL pointing to the style.css file in the same directory as the HTML
page itself. The type attribute is MIME Type and for CSS stylesheets it
should always be text/css. You can link as many stylesheets as you want
simply by using more link elements.
This is the most common approach. It lets you link many stylesheets which allows you to organize them somehow so that you don’t need to have a single incredibly long CSS file. It also allows sharing styles between different sites (usually styles for libraries – e.g. jQuery UI)
The only disadvantage of this approach is that it means that the browser has to sent another HTTP request for each linked style. This may cause a performance hit on the page loading which in turn may be avoided by setting up HTTP caching.
Inside Page
<!DOCTYPE html>
<html>
    <head>
        <title>SomePage</title>
        <meta charset='UTF-8'>
        <style type='text/css'>
            body {color: green;}
        </style>
        ...
    </head>
    <body>
    ...
    </body>
</html>
This approach allows you to set CSS for a single HTML page. It is used for pages which are entirely different. For example in most applications all pages look more or less the same and they certainly share most of the styles to maintain a consistent look & feel of the application. An exception to this would be the login page which usually looks completely different – it has different layout, no menu, only a simple form, etc.
The <style> element is therefore used in cases where it does not make sense to share
styles with the rest of the application. Alternatively it can be used to lower the
number of HTTP requests. Note that it is not a good idea to include CSS files in the page
(e.g. using PHP require) because the HTML page will
get unnecessarily large, it is better to set up HTTP caching.
Inline
Third (quick & dirty) option is to include styles in the style attribute:
<!DOCTYPE html>
<html>
    <head>
    ...
    </head>
    <body>
        <p style='color: red; font-weight: bold'>This text will be bold red.</p>
    </body>
</html>
When using this approach, only the CSS properties are used. Using CSS selector makes no sense, because the properties are applied only to the element (and its children) to which they are entered. This means that inline styles should be used only for exceptions from the the page styles. Otherwise the inline styles bear a lot of repetition and they cause a huge mess.
Inheritance & Cascading
Although the syntax for writing down CSS rules is pretty simple, the system through which these rules are applied is pretty complex. Inheritance and Cascading are two primary concepts which are used by web browsers to decide what an HTML element will look like.
Inheritance
Some properties defined for parent elements are inherited to child elements (again remember that HTML is hierarchical
structure of elements). The top element is body
(in some cases html is also used).
This means that the rule:
body {
    color: green;
}
sets font color to the body element. The setting is then inherited by all
of its child elements. And because all visible HTML elements
must be contained in the body element, it sets font color green for the entire document.
The rule can be overridden in child elements. E.g. I can create the following HTML page:
<!DOCTYPE html>
<html>
    <head>
        <meta charset='UTF-8'>
        <title>Sample page</title>
        <link rel='stylesheet' href='style-3.css'>
    </head>
    <body>
        <div>This is a div</div>
        <p>This is a paragraph</p>
        <ul>
            <li>Apples</li>
            <li>Oranges</li>
        </ul>
    </body>
</html>
Add the following CSS:
body {
color: blue;
}
p {
color: black;
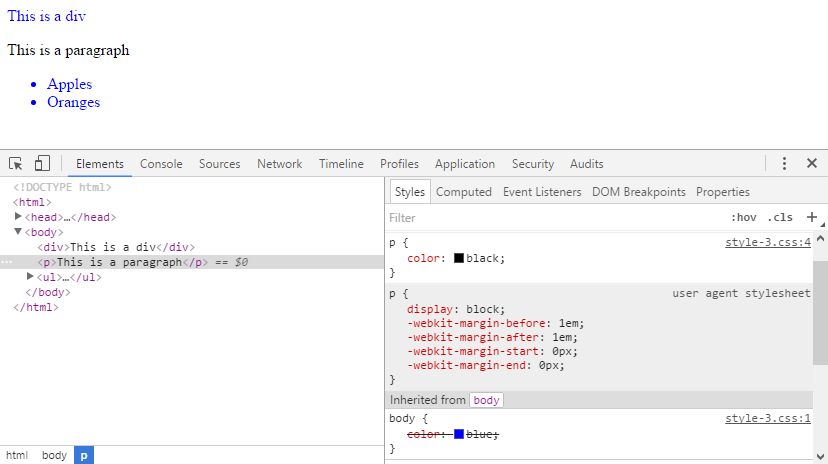
}In the above example, the body font color is set to blue. But for all p elements, it is set to
black. The latter rule overrides the former rule and makes all paragraphs black. You can see the
overriding in developer tools where the overridden property value is crossed out.
Not all CSS properties are inherited. Because there are hundreds of available CSS properties. Remembering a list of inherited and non-inherited properties is not practical. But if you use common sense judgement you’ll probably figure it out on your own. E.g. it does not make any sense to inherit any properties related to element size (width, height, margin, padding) because a child element with the same size as the parent element would not fit inside that parent element.
Background
One property which you may find particularly confusing is background, which is not inherited but it looks as if it is inherited. By default, each HTML element has no background. When an element has no background it is transparent, therefore you can see the parent element underneath. For example:
<!DOCTYPE html>
<html>
    <head>
        <meta charset='UTF-8'>
        <title>Sample page</title>
        <link rel='stylesheet' href='style-4.css'>
    </head>
    <body>
        <div>This is a div</div>
        <p>This is a paragraph</p>
        <ul>
            <li>Apples</li>
            <li>Oranges</li>
        </ul>
    </body>
</html>
body {
background-color: blue;
}
p {
background-color: black;
}If you look at the above page in developer tools, you will see the following:

I.e. you can see that the ul element has no background, and you can see its parent through it – the body
element with the green background. You can also see that there is not any overridden background for the p element.
Cascading
There are multiple places where a style declaration can be placed (inline, external styles, …) and multiple options how an element can be selected. Each property can also be specified any number of times. All this leads to a pretty complicated system in which some property values are inherited and then overridden by some other declaration somewhere else (I have showed simple overriding in the above paragraph).
Cascading stylesheets resolve these conflicts by the Cascade. The cascade is a system in which all values for a single property are put together and sorted by priority, the winning (cascaded) value is then applied to the element. The cascade is a rather complex system, however it works pretty intuitively. The following simplified rules are applied in the cascade:
- specificity – more specific selectors override
less specific selectors. For basic selectors this means that
id selector (e.g.
#someId) overrides class selector (e.g..someClass) which overrides type selector (e.g.ul). This gets more complicated in complex selectors but the rule of thumb is that a more specific rule wins over a generic one. I.e.p.firstParagraphis more specific than.firstParagraphwhich is more specific thanpselector. There is an exact formula for computing selector specificity. - origin and importance – author styles (provided in the page source by you) override the user-agent
styles (provided by the web browser). This can also be modified by the
!importantrule. - scope – a style with scope overrides a style without scope, the typical case is inline style which applies only to certain part of the HTML document (scope) and overrides the styles assigned to the entire document.
- order of appearance – the last declaration of property wins (applies only when none of the above resolve the priority)
Bear in mind that cascading is applied to individual properties and not entire rules. This is especially important for shorthand properties.
Shorthand properties
A shorthand property allows you to define values for multiple properties at once. Common examples are:
background, margin, border, padding…
E.g. setting:
border: 1px solid black;is equivalent to:
border-width: 1px;
border-style: solid;
border-color: black;
which also shorthand and is equivalent to:
border-top-width: 1px;
border-right-width: 1px;
border-bottom-width: 1px;
border-left-width: 1px;
border-top-style: solid;
border-right-style: solid;
border-bottom-style: solid;
border-left-style: solid;
border-top-color: black;
border-right-color: black;
border-bottom-color: black;
border-left-color: black;
Lets say that I want to create a page like this:
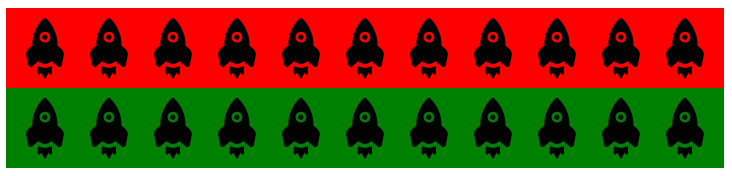
All I need is a simple HTML page with two divs:
<!DOCTYPE html>
<html>
    <head>
        <meta charset='UTF-8'>
        <title>Sample page</title>
        <link rel='stylesheet' href='style-7a.css'>
    </head>
    <body>
        <div class='redRockets'></div>
        <div class='greenRockets'></div>
    </body>
</html>
And some CSS to set height and background to them (rocket icon from simpleicon.com):
.redRockets {
background: red url(rocket-64x64.png) repeat-x 50% 50%;
height: 80px;
}
.greenRockets {
background: green url(rocket-64x64.png) repeat-x 50% 50%;
height: 80px;
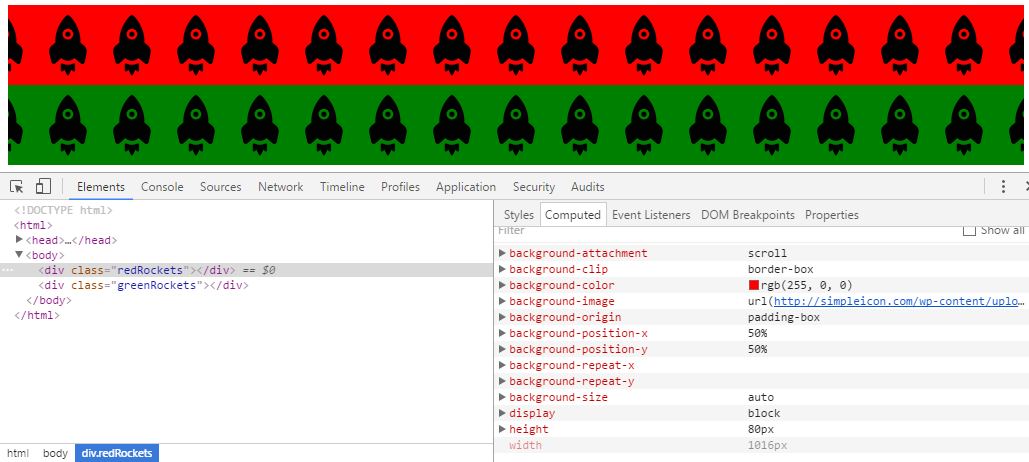
}Background background is shorthand property, which can be seen in browser developer tools,
when you switch to computed properties:
So writing down:
background: red url(rocket-64x64.png) repeat-x 50% 50%;is equivalent to:
background-color: red;
background-image: url(rocket-64x64.png);
background-repeat-x: repeat;
background-position-x: 50%;
background-position-y: 50%;
background-repeat-y: no-repeat;
You can take advantage of this (and the fact that you can assign more classes to a HTML element) and simplify the CSS code to:
.rockets {
    background: url(rocket-64x64.png) repeat-x 50% 50%;
    height: 80px;
}
.red {
    background-color: red;
}
.green {
    background-color: green;
}
<!DOCTYPE html>
<html>
<head>
<meta charset='UTF-8'>
<title>Sample page</title>
<link rel='stylesheet' href='style-7b.css'>
</head>
<body>
<div class='red rockets'></div>
<div class='green rockets'></div>
</body>
</html>However if I set the background color for the rockets class as well:
.rockets {
    background: blue url(rocket-64x64.png) repeat-x 50% 50%;
    height: 80px;
}
.red {
    background-color: red;
}
.green {
    background-color: green;
}
It still works well, but this one would not:
.red {
    background-color: red;
}
.green {
    background-color: green;
}
.rockets {
    background: blue url(rocket-64x64.png) repeat-x 50% 50%;
    height: 80px;
}
When I set the background-color for rockets class as well, the Cascade kicks in. Notice that
in the above examples it wasn’t used at all. There were no conflicts – although I was setting
background in multiple places, a single background property was never set twice. By setting
background-color for the rockets class this changed. Now the first example works and the
second one does not. This is by the the order of appearance rule – i.e. the last definition
of background-color wins, because the selectors .rockets and .red are otherwise equivalent.
This one does work however:
div.red {
    background-color: red;
}
div.green {
    background-color: green;
}
.rockets {
    background: blue url(rocket-64x64.png) repeat-x 50% 50%;
    height: 80px;
}
Now red and blue win, because the selector div.red has greater specificity
than the simple class selector .rockets. Take some time to experiment with different selectors
and Cascade rules.
Working with the Cascade
The principles on which the CSS Cascade is built encourage you to use top-down and
general-specific approach. This means that you should start defining your styles from top HTML
elements – body and other elements which contain larger portions of the page. And gradually
you get down in the HTML tree. In a same manner, you should start with general rules – type selectors
and then continue to more specific class selectors.
In practice this means that when you have a table in a page and you want to make that table e.g. 500px wide,
you don’t go and add table {width: 500px;} to your stylesheet. You have to ask first:
- what does a normal table look like?
- what other kinds of tables will I use?
- what are the edge cases end exceptions?
Then you should end up with something along the lines:
table {width: 50%}table.wide {width: 100%}table.userList {width: 500px}#userListOnLoginPage {width: 430px}
Setting the general rules first makes it much easier to maintain the styles. This leads to the concept of CSS Reset style. Contrary to popular belief, CSS Reset is not a single universal style to override all user-agent and default values. It is a baseline for your own page style.
Now try to guess the behavior of following rules:
body {
	font-size: 12px;
}
table {
	font-size: 20px;
}
p {
	font-size: 5px;
}
td:first-child p {
	font-size: 30px;
}
<!DOCTYPE html>
<html>
<head>
<meta charset='UTF-8'>
<title>Sample page</title>
<link rel='stylesheet' href='style-8.css'>
</head>
<body>
<p>Standalone paragraph</p>
<div>A standalone division</div>
<table border='1'>
<tr>
<td>First cell</td>
<td><p>Second cell with paragraph</p></td>
</tr>
<tr>
<td><p>Third cell with paragraph</p></td>
<td>Fourth cell</td>
</tr>
</table>
</body>
</html>What would be the font size of the div outside of the table and why?
The div outside of the table would have font-size 12px, because it inherits font size from
its parent (body). There is no CSS rule applicable to that div, therefore no cascading happens.
What would be the font size of the paragraph outside of the table and why?
The p outside of the table would have font-size 5px, because there is rule
p { font-size: 5px; } which sets font size to all paragraphs. It overrides the
inherited font size from its parent (body).
What would be font size of the first table cell and why?
The td inside the second table cell would have font-size 20px, because it no CSS rule
is applied to it, so it inherits font size from
its parent (tr), which inherits font size from its parent (table). To that element the rule
table { font-size: 20px; } is applied, which overrides the inherited value from its parent (body).
What would be font size of the first paragraph inside the table (second cell) and why?
The p inside the second table cell would have font-size 5px, because the rule p { font-size: 5px; }
is applied to it, which overrides the inherited value from its parent (table), which overrides the
inherited value from its parent (body).
What would be font size of the second paragraph inside the table (third cell) and why?
The p inside the fourth table cell would have font-size 30px, because the rule td:first-child p { font-size: 30px; }
is applied to it. This rules overrides the value from rule p { font-size: 5px; }, because it has
higher specificity.
Selector Combinators
Now that you understand how cascading works, you can have a look at a more complicated example with selector combinators. With the following CSS style:
ul, ol {
	font-size: 20px;
}
ul li {
	background: grey;
}
ul>li {
	background: red
}
ul.menu {
	background: yellow;
}
ul.menu a:visited {
	color: cyan;
}
li#special a:visited {
	color: magenta;
}
li ~ li {
	text-decoration: underline;
}
… and the following HTML page:
<!DOCTYPE html>
<html>
    <head>
    	<link rel='stylesheet' href='style-9.css'>
        <meta charset='UTF-8'>
        <title>CSS example</title>
    </head>
    <body>
        <p>This is a plain paragraph</p>
        <ul>
            <li>first ul with a <a href='http://example.com'>link</a></li>
            <li>second ul</li>
            <li>third ul
                <ol>
                    <li id='special'>first ol with a <a href='http://example.com'>link</a></li>
                    <li>second ol</li>
                    <li>third ol</li>
                </ol>
            </li>
        </ul>
        <ol>
            <li>first ol</li>
            <li>second ol</li>
            <li>third ol</li>
        </ol>
        <ul class='menu'>
            <li>first ul <a href='http://example.com'>link</a></li>
            <li>second ul</li>
            <li>third ul
                <ol>
                    <li>first ol with a <a href='http://example.com'>link</a></li>
                    <li>second ol</li>
                    <li>third ol</li>
                </ol>
            </li>
        </ul>
    </body>
</html>
The page will display like this:
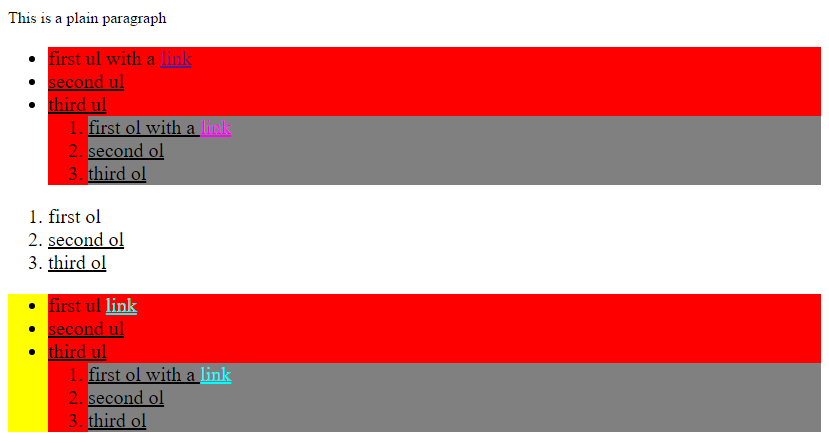
Ok, this looks really ugly, but it demonstrates different selector and combinators. There are
three lists in the page, the first and third are un-ordered and the second one is ordered. The
first and third lists also contain a nested ordered list. The third list has class menu and
there is also a paragraph at the beginning for comparison with the base style.
The rule ul, ol { font-size: 20px; } applies to all lists and their items (because they
inherit the font-size property). It does not apply to the paragraph. The
rule ul li applies to all un-ordered list items and makes them on grey background. But then
the rule ul>li kicks in and overrides the background for the li items that are
direct descendants of ul to red. Notice that none of this applies to the
standalone ol list which remains with the transparent background (so you can see the user-agent
default white background of body). Also notice, that the
rule ul li applies to the nested ol, because its li items are still descendants
of some ul element (though not direct). Then there is the rule ul.menu that applies only
to the third list and makes it yellow. Also notice that the rule applies only to the list
itself (not the list items, their background is set by ul li rule), so the only yellow part is list itself.
Then there is the rule ul.menu a:visited which makes all visited links in the third list cyan colored. The
rule li#special a:visited makes the second link in the first list magenta colored because
it is contained in an li with id special. It has higher specificity (using id instead of class),
therefore it overrides the previous rule. To test the visited and unvisited links,
open an anonymous (private) browser window.
The last rule is li ~ li which selects all but the first item in every list (every li item that
has a preceeding sibling li) and makes them underlined. Notice that the first item
of the nested list is underlined too, because it inherits the underline from the parent li.
Also notice that it works for all three top-level lists, because the preceeding li must be a sibling.
Therefore the first item in the second list is not underlined, even though it has a preceeding
li, but that li is not a sibling. Therefore each list is processed independently.
CSS Colors
CSS uses the RGB color model because it is primarily designed to display on screen (as opposed to e.g. CMYK color model primarily designed for printing). The RGB color model uses three components – red, green and blue and is additive. You can image additive color model as mixing of lights (spotlights). The base color is black (no light is emitted). When you turn on green light to maximum, you’ll (obviously?) obtain green color. When you turn on red light to maximum as well, you’ll obtain yellow color (as a mix of 100% green and 100% red). If you happen to get hands on a red, green and blue reflector, you can try it yourself, it really works this way.
The important part is that RGB mixes colors using three components which have intensity. The intensity can be specified either in percents (0% – 100%) or absolute value (0 – 255). There are three basic options how an RGB color value can be written down in CSS:
- using a predefined name:
red, - using
rgbfunction with intensities:color: rgb(255, 0, 0); or with percentages:color: rgb(100%, 0, 0), - using
rgbafunction with alpha channel intensities:color: rgba(255, 0, 0, 1); or with percentages:color: rgb(100%, 0, 0, 1), - using
hslfunction defining the HSL (Hue-saturation-lightness) representation of RGB model:hsl(0, 100%, 50%), - using
hslafunction defining the HSL representation of RGB model with alpha channel:hsl(0, 100%, 50%, 1), - using the hexadecimal number of each component:
#FF0000or shorthand hexadecimal notation#F00
Alpha channel
The Alpha channel defines transparency of color. It is not strictly part of RGB model, because it does
change the color hue. The alpha channel has value 0 – 1. Value 0 makes the color fully transparent, value 1
makes the color fully opaque (transparency is set to 0). The default value is 1, i.e. if you do not want
transparent color, you can use the rgb function or rgba function with last value 1.
Also keep in mind, that if you set alpha channel to 0, then the color is fully transparent, therefore it
does not matter what color it is.
Hexadecimal colors
When representing RGB colors with hexadecimal values,
you need to take care to convert them correctly. You have to convert each component individually,
i.e. the number #FF0000 represents 100% red, because FF in hexadecimal is
255 in decimal. If you try to convert the
number #FF0000 to decimal, you’ll obtain nonsense – 16711680.
Hexadecimal values can be shortened to three digits in case the digits in each component are repeated.
That means, you can shorten #FF0000 to #F00. Keep in mind that the shortening is always applies to
each component individually and either to all components or to no components. Therefore #F0 or #FF00 would be
invalid. The value #FF0 represents #FFFF00 (100% red and 100% green).
Hue-saturation-lightness
HSL (Hue-saturation-lightness) is a different representation of the RGB model. As the name suggests, it uses three components:
hue– the color hue value (0 – 360), represents position over a ‘rainbow’ of colors,saturation– represents the color intensity (0 – 100%), 0% is grey, 100% is full color,lightness– represents the lightness of color (0 – 100%), 0% is black, 100% is white.
You can read more about available color values in the color documentation. To select a color value use a color picker or color scheme picker to pick multiple matching colors.
CSS Units
There are many CSS units) to set sizes of different elements, most used ones are px, em, rem, pt and %. The available units fall into categories:
- absolute units – pixels (
px), centimeters (cm), millimeters (mm), points (pt), … - relative units – percents (
%)- font-relative units – em (
em), em of the root element (body) (rem), x-height ex (ex), advance height ch (ch) …
- font-relative units – em (
- viewport-relative units – viewport width percent (
vw), viewport height percent (vh), the larger ofvworvh(vmax), the smaller ofvworvh(vmin) …
Absolute units have exactly defined physical values, including the pixel (which has a rather complicated definition). But beware that inches and centimeters are actually converted to pixels. It is generally better to use font-relative units for good page design. This is because the end-user might want to use bigger font to improve page readability. Using relative units makes the rest of the page accommodate to that.
You may also encounter unit-less values. A typical example would be margin: 0, it is perfectly valid to write
this because it makes no difference where it is zero points or zero pixels. Another example is e.g. the
line-height property which can be specified as multiplier. I.e. line-height: 1.2 means 1.2 × bigger
then the base line height defined by the font. You can read more about various units in the
documentation.
Do you remember CSS Box Model? Think of it a bit. You cannot simply use
different CSS units for border/padding/margin and width/height if you want to achieve precise size of an element.
Thankfully there is the calc() function in CSS which you can
use to determine correct size of element. E.g. if you want to have five 20% wide elements with 5px border you can set
CSS like this:
div.box {
  width: calc(20% - 10px);
  float: left;
  height: 50px;
  border: 5px solid red;
}
<div class="box">1</div>
<div class="box">2</div>
<div class="box">3</div>
<div class="box">4</div>
<div class="box">5</div>This makes each div element 20% wide including its border.
At rules
At rules are part of CSS syntax I omitted at the beginning. At rules are special kind of rules which do not immediately define a style for some HTML elements. Some common at rules are:
@charset– used to specify the character encoding e.g.@charset "UTF-8";, important when using thecontentproperty.@media– allows to defined nested rules for different media types (screen,print,speech). This is very useful to create styles for pages that print nicely – e.g.@media print { body { font-size: 10pt } }.@font-face– Allows you to define a font, which is not installed on the end-user computer. The font will be downloaded with the web page.@import– Allows importing other CSS file. This can be used to organize he CSS code better – e.g.@import url("colors.css").
Summary
In this article I tried to describe the syntax and some important concepts of Cascading style sheets (CSS) langauge. There are also other languages for defining CSS rules – e.g. LESS or SASS which aim to simplify the stylesheets. All of these languages however always have to be transformed into CSS, as that is the only language which web browsers understand.
Although the syntax of the CSS language is pretty simple, the rules which are used when actually drawing HTML elements on screen are very complex. That means that creating a full page layout and design from scratch is non-trivial task and requires a lot of experience and deep understanding of CSS. It is also a very creative process, meaning that two different people will usually come up with two different solutions of page layout (HTML and CSS structure) which can render similar results in a browser. Fortunately there is an immense amount of ready to use (and free) templates with various complexity and support for customization, e.g.:
- Bootstrap (getbootstrap.com),
- Free CSS Layouts (maxdesign.com.au),
- Foundation (foundation.zurb.com),
- Skeleton (getskeleton.com),
- SemanticUI (semantic-ui.com).
You can follow the corresponding part of walkthrough to get acquainted with Bootstrap framework.
New Concepts and Terms
- CSS
- rule
- selector
- property
- rendering
- layout
- class
- pseudo-class
- pseudo-element
- combinator
<link><style>- inheritance
- cascading
- shorthand property
- CSS reset
- RGB model
- alpha channel (transparency)
- Hue-Saturation-Lightness
- hexadecimal colors
- absolute units
- font-relative units
- at-rules